Properly Connecting FJ Gear to Your Camera (HSS and TTL)Updated 4 months ago
FJ wireless triggers are designed with a universal hot shoe mount to control FJ Wireless flash systems. They are compatible with most camera brands, including Canon, Nikon, Sony (manual mode), Fuji, Panasonic Lumix, and Olympus, and are backward compatible with all FJ Wireless flashes.
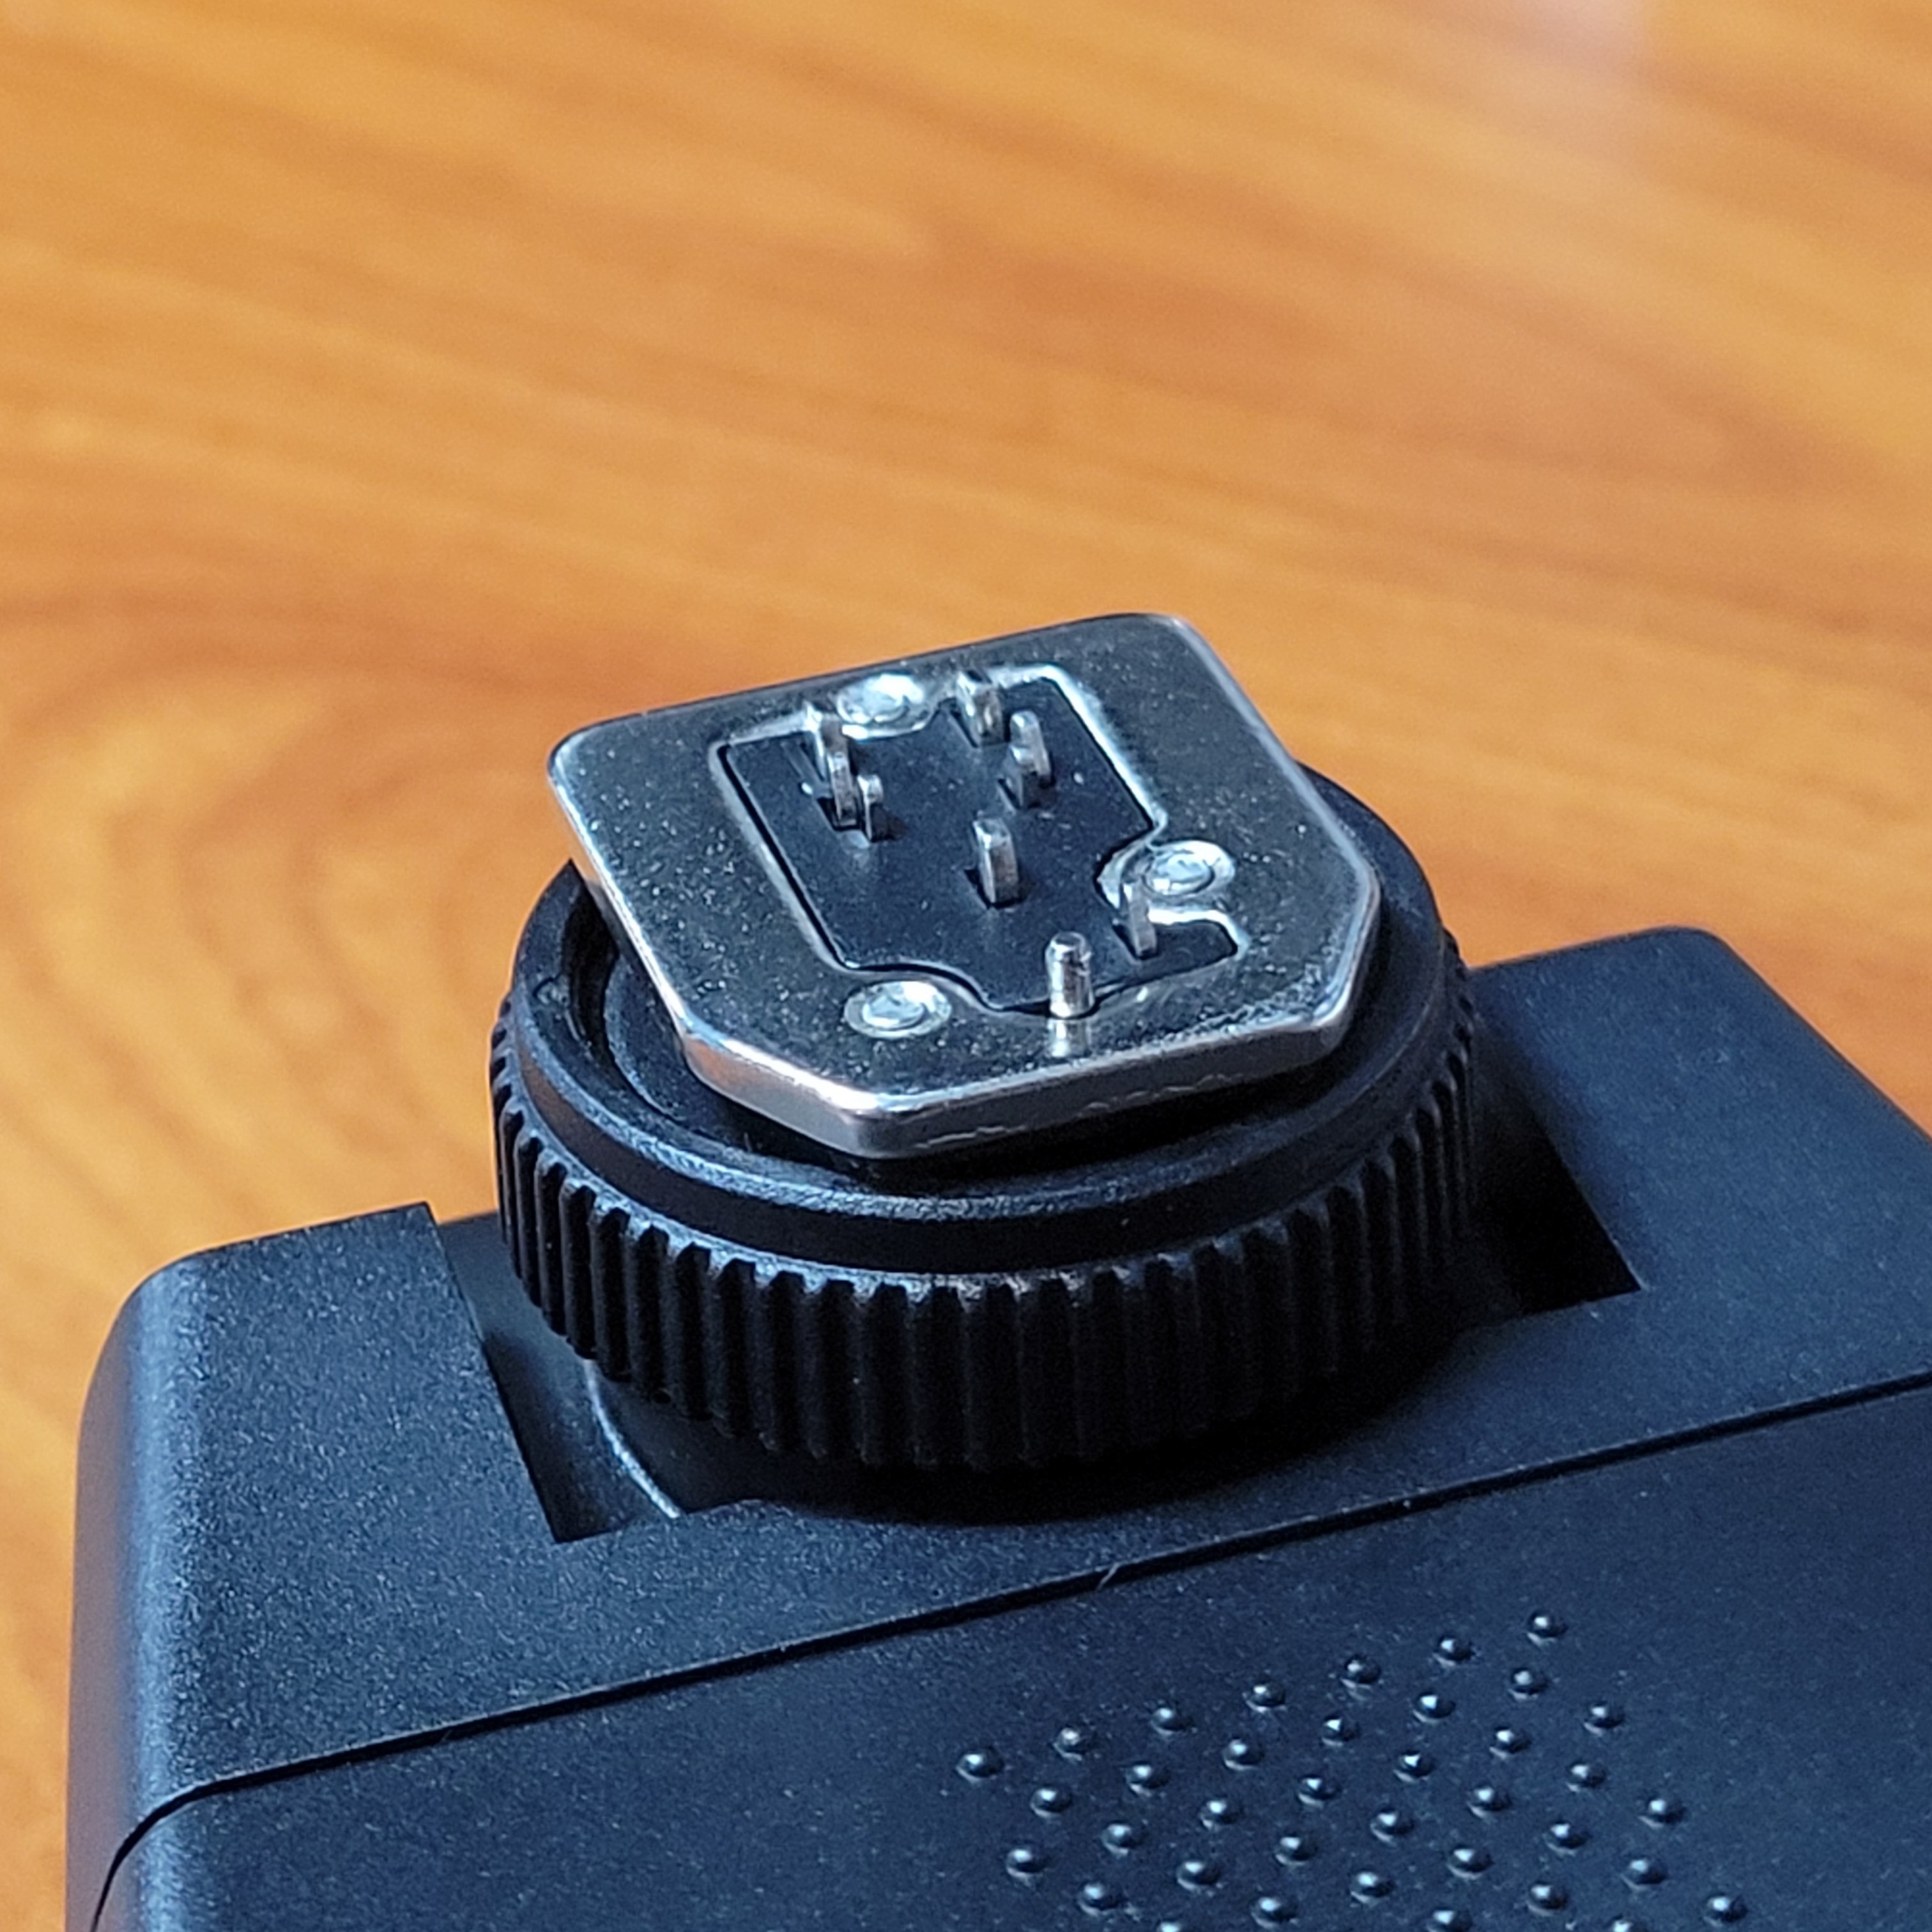
Proper Pin Alignment
Because FJ wireless systems use a universal hot shoe mount, it's important to ensure the trigger is set to the appropriate camera manufacturer and that all pins are properly aligned.
Inspecting the Trigger's Locking Pin:
- With the trigger detached and the LCD screen facing away, loosen and tighten the shoe lock.
- Observe the pin closest to you moving up and down. This is the locking pin that matches a port on your camera's hot shoe.
- Ensure this pin is aligned with the port on your camera's hot shoe.
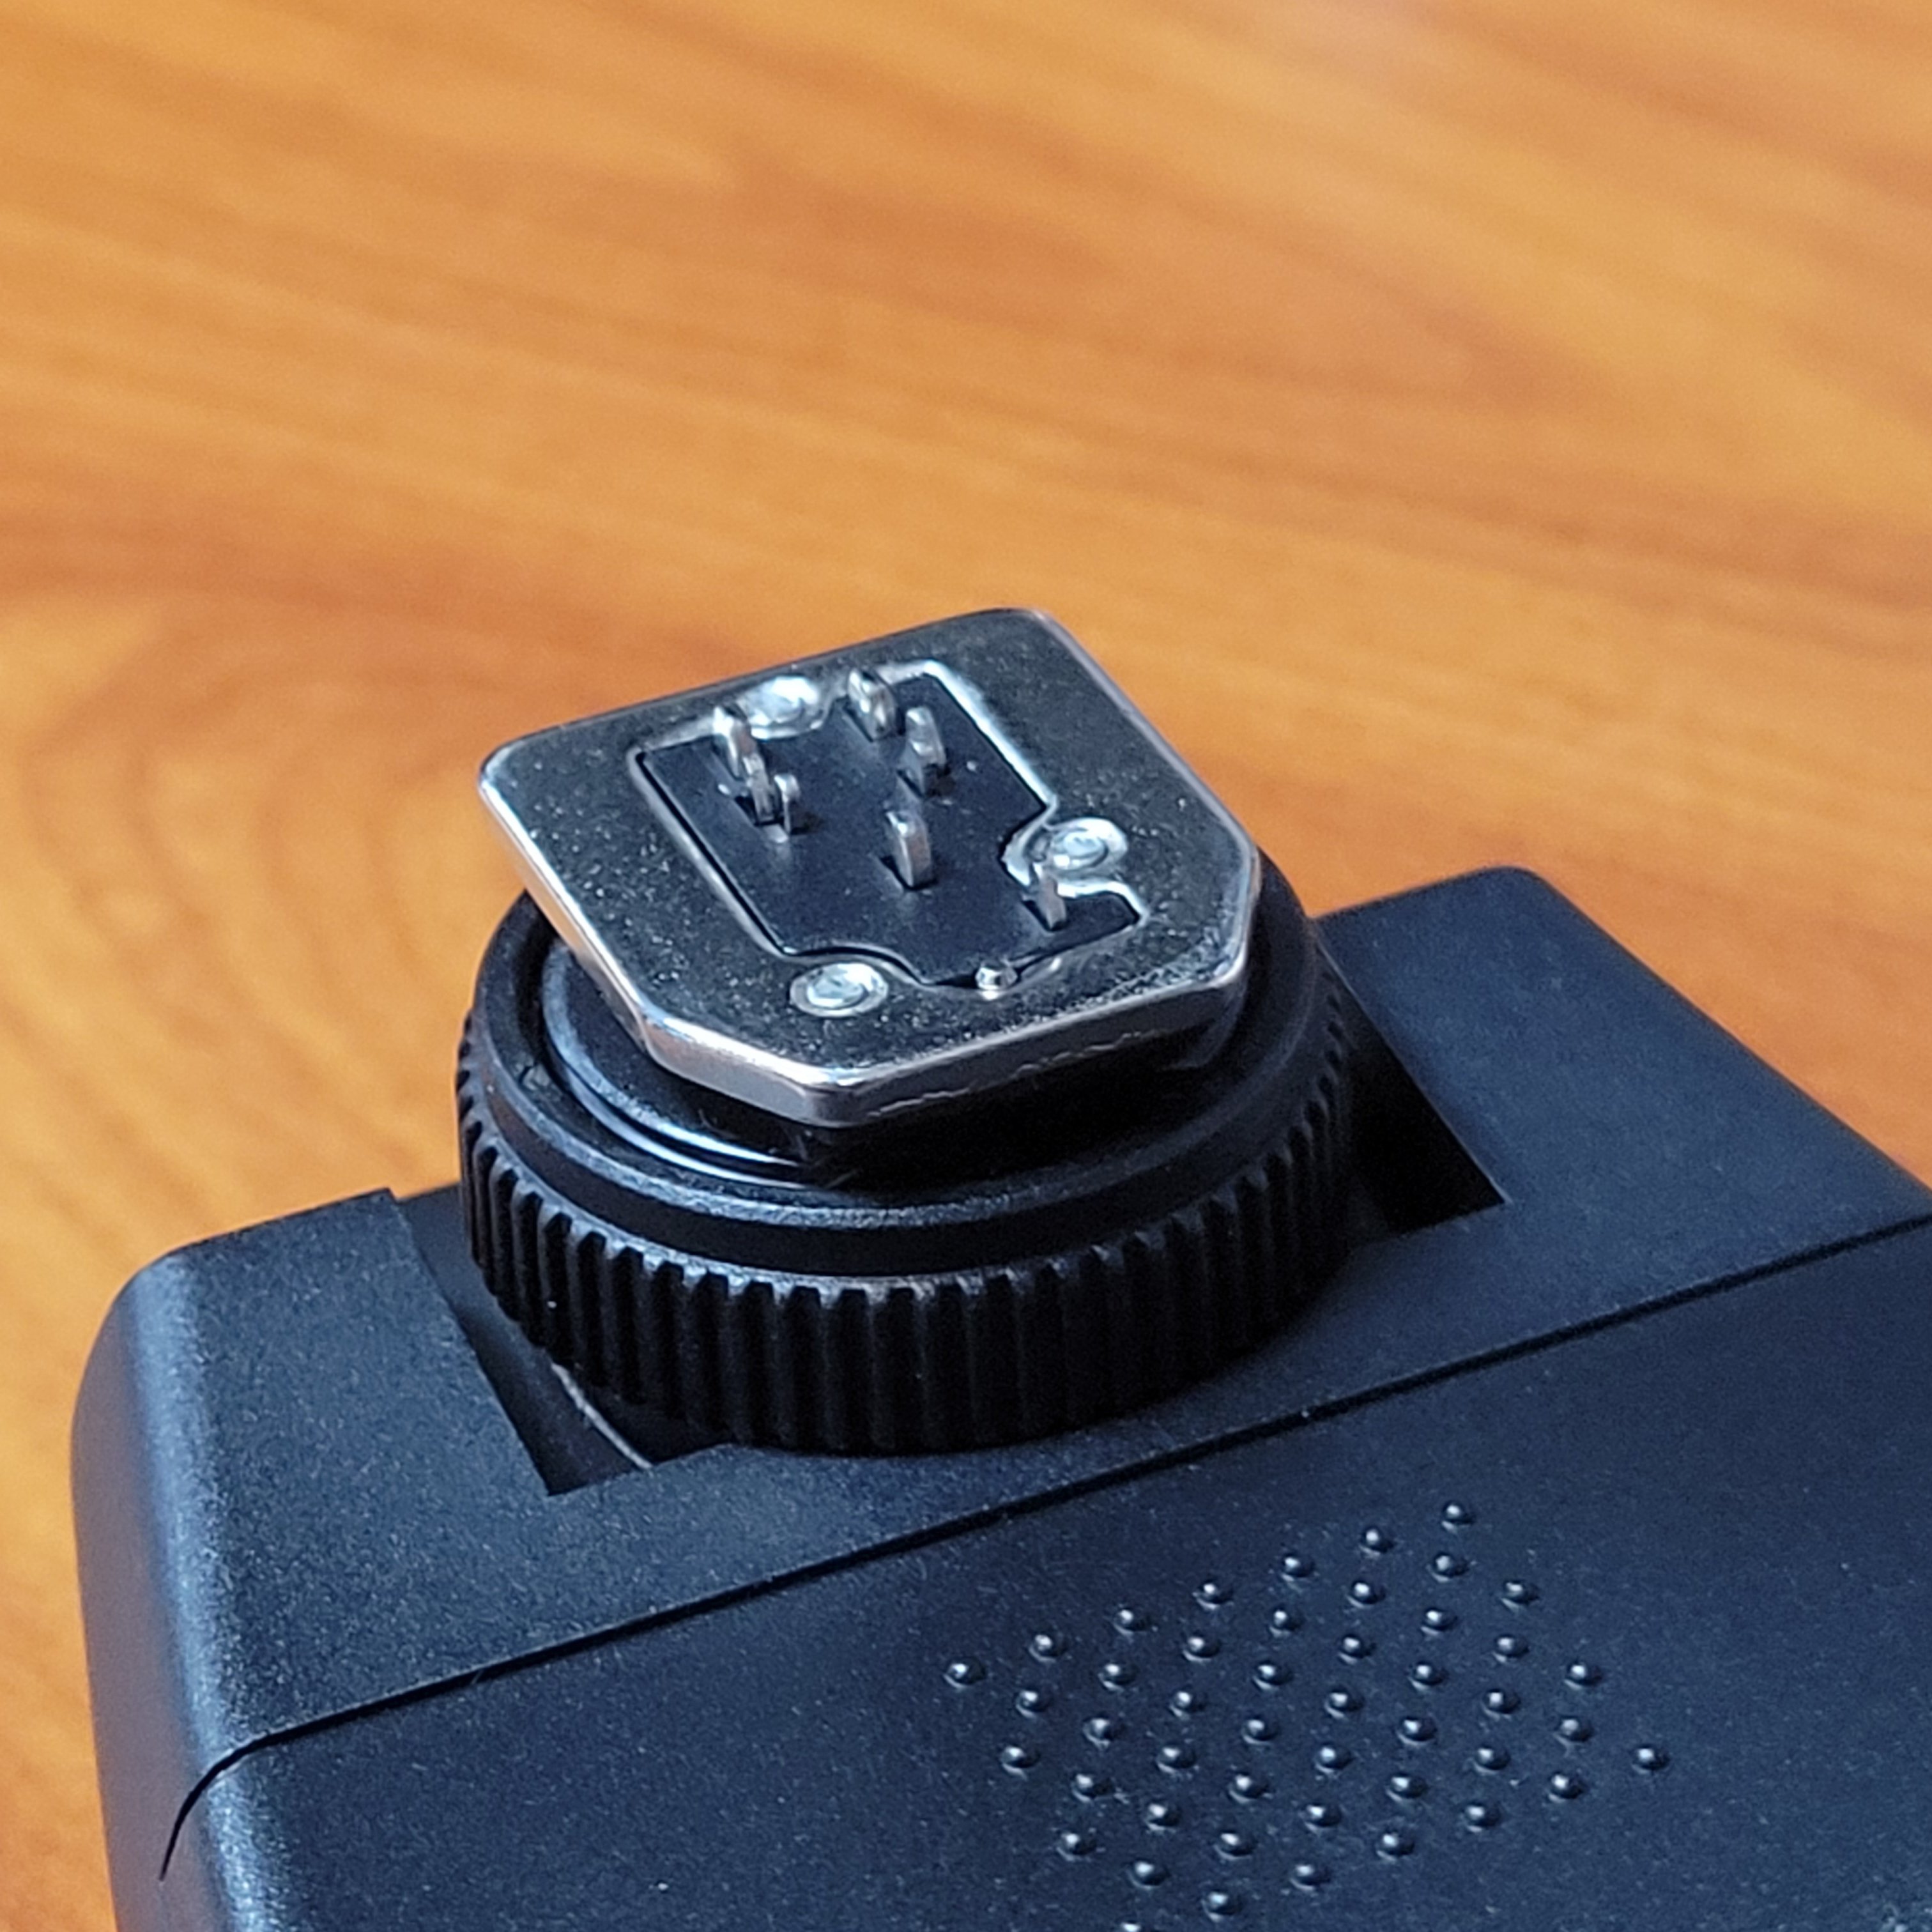
Attaching the FJ Wireless Trigger or Flash
Follow these steps to properly attach your FJ wireless trigger or flash:
- Fully loosen the shoe lock with the unit detached from your camera.
- Slide the unit onto the camera's hot shoe.
- Rotate the shoe lock about halfway to its fully locked position. The unit should still be slightly loose.
- Slightly pull or push the unit to ensure the locking pin falls into place
(you might hear a faint "click"). - Fully tighten the shoe lock.
Checking The Quality of Connection
FJ-X2 M and FJ-X3 M
Fuji Cameras
With the trigger attached to your camera, both the camera and trigger are powered on and the trigger is set to Fuji, when autofocusing or metering with your camera you should notice a little LED light above the LCD screen flashing green. This signals you have a good connection between the trigger and your camera.
All Other Camera Manufacturers
With the trigger attached to your camera, both the camera and trigger are powered on and the trigger is set to your desired camera manufacturer, when autofocusing or metering with your camera you should notice a little LED light above the LCD screen is solid green. This signals you have a good connection between the trigger and your camera.
FJ80 & FJ80II
You will know if you have a proper connection between your flash and your camera when your selected manufacturer is green when autofocusing or metering for exposure.
FJ80II SE
You will know if you have a proper connection between your flash and your camera when you see a “link” icon (two circles intertwined) under the selected manufacturer when autofocusing or metering for exposure.
Camera Settings and Compatibility
Cameras are thoroughly tested to ensure proper synchronization and use of HSS and TTL features. Check your camera's compatibility with the FJ Wireless System Camera Compatibility page.
Additionally, check these settings in your camera.
- Flash: Enable
- Shutter Mode: Mechanical if available otherwise E-Front Curtain Shutter
- Flash Mode: Fill
- Silent Shutter: Off/Disabled
- Red Eye reduction-Off/Disabled
- Wireless Flash: Off
- Flash sync Auto FP 1/250 (Nikon and Fuji) to enable HSS
Firmware Updates
Keeping your trigger's firmware up to date is crucial. To check your current firmware version, look at the bottom right of the boot-up screen when powering on your Westcott equipment. For the latest firmware, visit the Westcott Firmware page. For guidance on when and how to update firmware, see the When to Update Firmware page.
Additionally, you can reference FJ Wireless Guide to Optimal Performance to learn more about firmware updates, positioning, and resetting.
If you've followed these steps and are still experiencing issues, please reach out to us via chat, email, or phone through the Contact Us page.